
Diagonal Granite Stitch Dishcloth (Dishcloth Series #1)

To keep my mind off the craziness, I've been on a dishcloth kick this spring/summer. I have designed several different crocheted dishcloths that I decided to present in a special July series.
The first installment is the Diagonal Granite Stitch Dishcloth. This is a simple pattern, easy enough for a confident beginner. It is crocheted from corner to corner, increasing for the first half of the square and decreasing for the second half. With just enough stretch, it is designed to actually wash dishes, and not just decorate the kitchen. Not that it won't give your kitchen a nice, handmade, country kitchen feel.
I will be sharing a new dishcloth pattern each week through the month of July.
Okay, I admit it. This one is not a super new idea. It is just a larger, looser version of my Crocheted Drink Napkins. I got the idea when I used a drink napkin to test how well Lion Brand Comfy Cotton Blend works as a dishcloth. As you probably know by now, I like to crochet (and knit) practical items. I only design items that I will actually use. I was happy with the performance of the drink napkin as a dishcloth, so here is the dishcloth pattern.
Below is a preview of (most of) the rest of the series. Remember to check back each week or subscribe to my blog for updates when each new pattern is posted!

If you just can't wait to get your hands on these patterns, the entire bundle will hit my Etsy shop soon. They will be sold together as individual pdfs to make printing just one of the patterns easier.
If you would like to purchase the printable pdf of this pattern only, it is already available in my Etsy shop.
Add this pattern to your Ravelry queue.
Keep scrolling for the full written pattern.
Diagonal Granite Stitch Dishcloth
Crochet Pattern
Finished Size
Each dishcloth measures approximately 8" (20 cm) by 8” (20 cm).
Instructions are written using standard US abbreviations.
Ch - chain
Sc - single crochet
Sc2tog - single crochet 2 together

Materials
Lion Brand Comfy Cotton Blend (7 oz./200 g; 392 yds./ 358 m) (I used #708 Cloud Nine for the cloth pictured above)
Size H/7 (5.00 mm) crochet hook, or size needed to obtain gauge
Gauge
Gauge is not important for this project, but if you want your dish cloth to measure 8” by 8”, try to stay at the following gauge:
22 stitches/20 rows = 4 inches (10 cm) in pattern stitch.
Instructions
First half of square - increasing at both ends of each row.
Row 1: Ch 2. [Sc, ch 1, sc] in 2nd ch from hook.. Turn.
Row 2: Ch 1, sc in first sc. Ch 1, sc in ch 1 sp. Ch 1, sc in last sc. Turn.
Row 3: Ch 1, sc in first sc. *Ch 1, sc in next ch 1 sp. Repeat from * to last ch 1 sp. Ch 1, sc in last sc. Turn.
Rows 4-27: Repeat Row 3. At the end of Row 27, each short edge of the triangle you have worked should measure approximately 8" (20 cm). You can make your dishcloth any size you like by crocheting more or fewer rows.
Second half of square - decreasing at both ends of each row.
Row 28: Ch 1, sc in first ch 1 sp. *Ch 1, sc in next ch 1 sp. Repeat from * to second ch 1 sp from end. Sc2tog in last ch 1 sp and last sc. Turn.
Rows 29-53: Repeat Row 28.
Row 54: Ch 1, sc2tog in ch 1 sp and last sc. Fasten off. Weave in ends.
Diagonal Striped Pattern
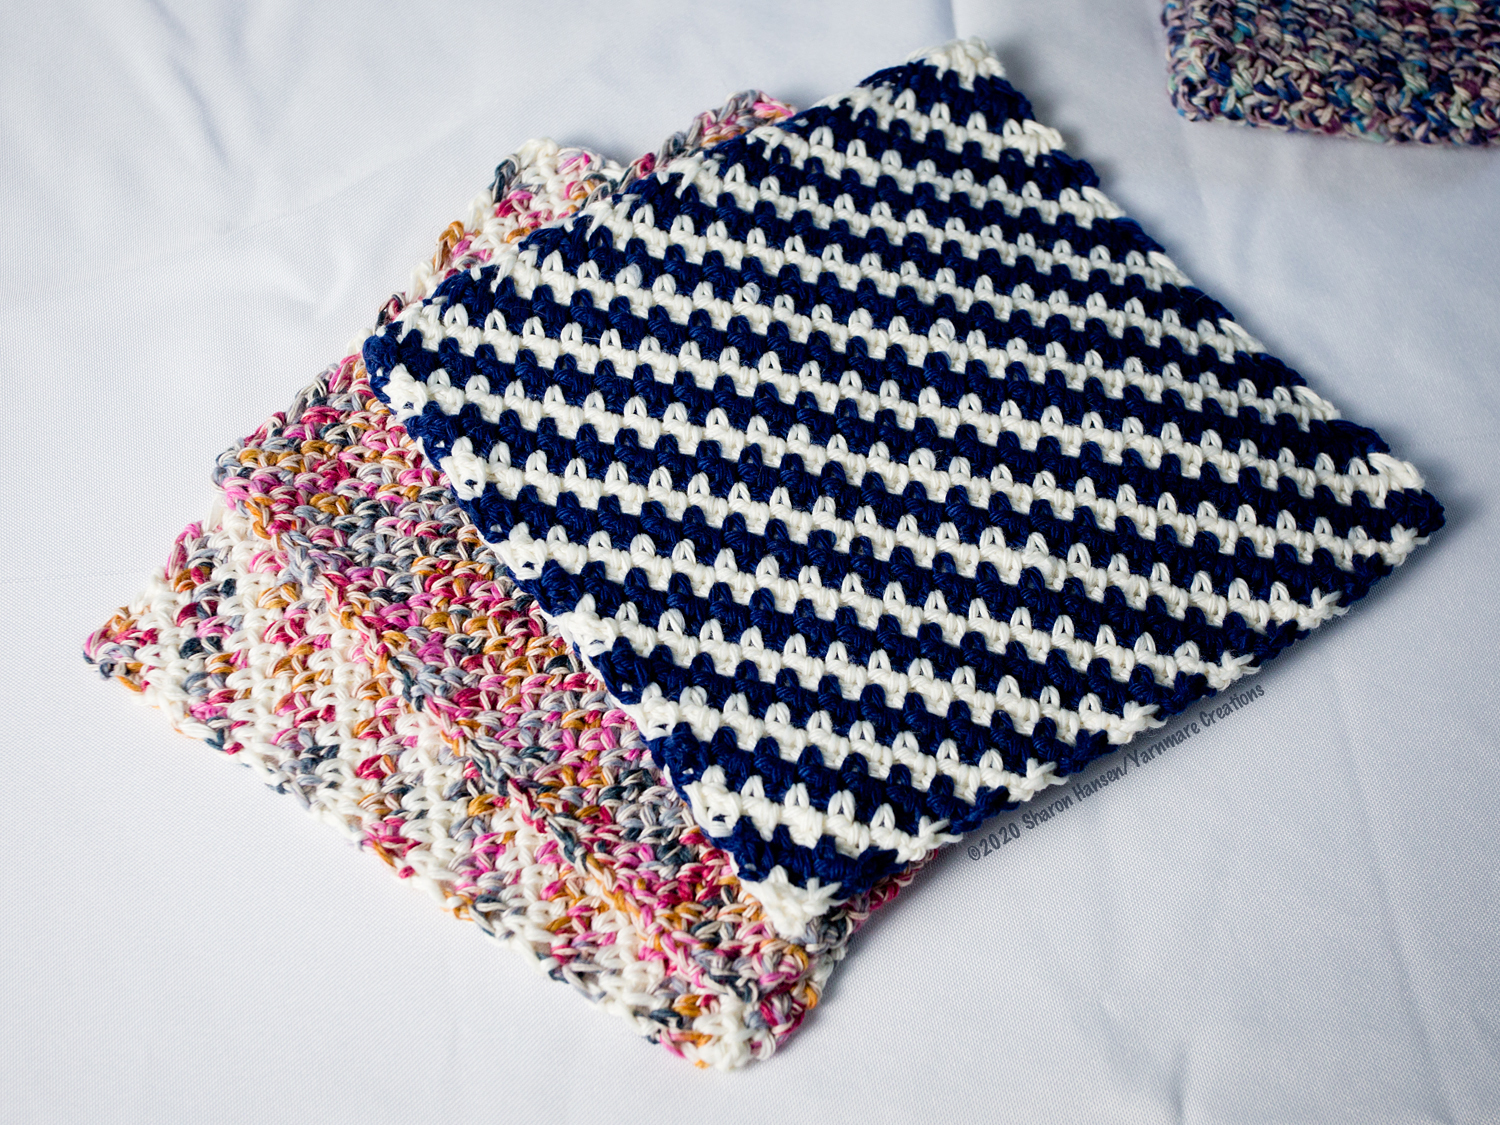
This dishcloth can be made with dramatic, diagonal stripes by alternating colors every two rows. To keep the edges neat while carrying the unused color up the sides, follow the directions in the photo tutorial below.
For the dishcloths pictured above I used Lion Brand Comfy Cotton Blend in #098 Whipped Cream, #718 Mai Tai, and #110 Spectrum.
In this photo you can see the first few color changes made in the traditional way. At the end near my hand, the yarn carried up the edge leaves long strands. Further to the right I changed methods. By working my turn chains around the carried yarn, the edge strands are more contained, leaving a neater edge.

Photo Tutorial
Here is how I included the carried color in my turn chain for a neater edge.
 |
| Step 1: Complete rows the first 2 rows. Do NOT finish the last stitch of Row 2. Stop with 2 loops on your hook. |
 |
| Step 2: Yarn over with second color and draw through both loops on hook. |
 |
| Step 3: Bring the first color (blue) behind the new color (white). |
 |
| Step 4: Bring new color behind first color, creating a little twist. |
 |
| Step 5: Chain 1 with new color, allowing old color to ride in the back loop of the chain. |
 |
| Step 1: Bring Color B (white) in front of Color A (blue) to complete the last stitch in the row. |
 |
| Step 2: Bring Color A (blue) in front of Color B (white). |
 |
| Step 3: Bring Color B (white) back in front of Color A (blue). You are now ready to chain 1 with the blue yarn through the back bump of the chain. |
 |
| Here you can see how the last stitch with Color B (white) appears completed by working it into the turn chain. As an Amazon Affiliate, I earn from qualifying purchases. Copyright © 2020 Sharon Hansen/Yarnmare www.yarnmare.blogspot.com | facebook.com/yarnmare | Instagram @yarnmare The pattern and photographs of this design are the property of Sharon Hansen/Yarnmare. This pattern and design are subject to copyright, and are for personal, non-commercial use only. You may not distribute or sell this pattern or any items created using the directions in this pattern without consent. Please email yarnmare@gmail.com with any questions. |


Comments
Post a Comment