
Granite Stitch Placemat Pattern
Hi everyone! Today I am posting my first ever written pattern! Please try it out and give me feedback if anything isn't clear.
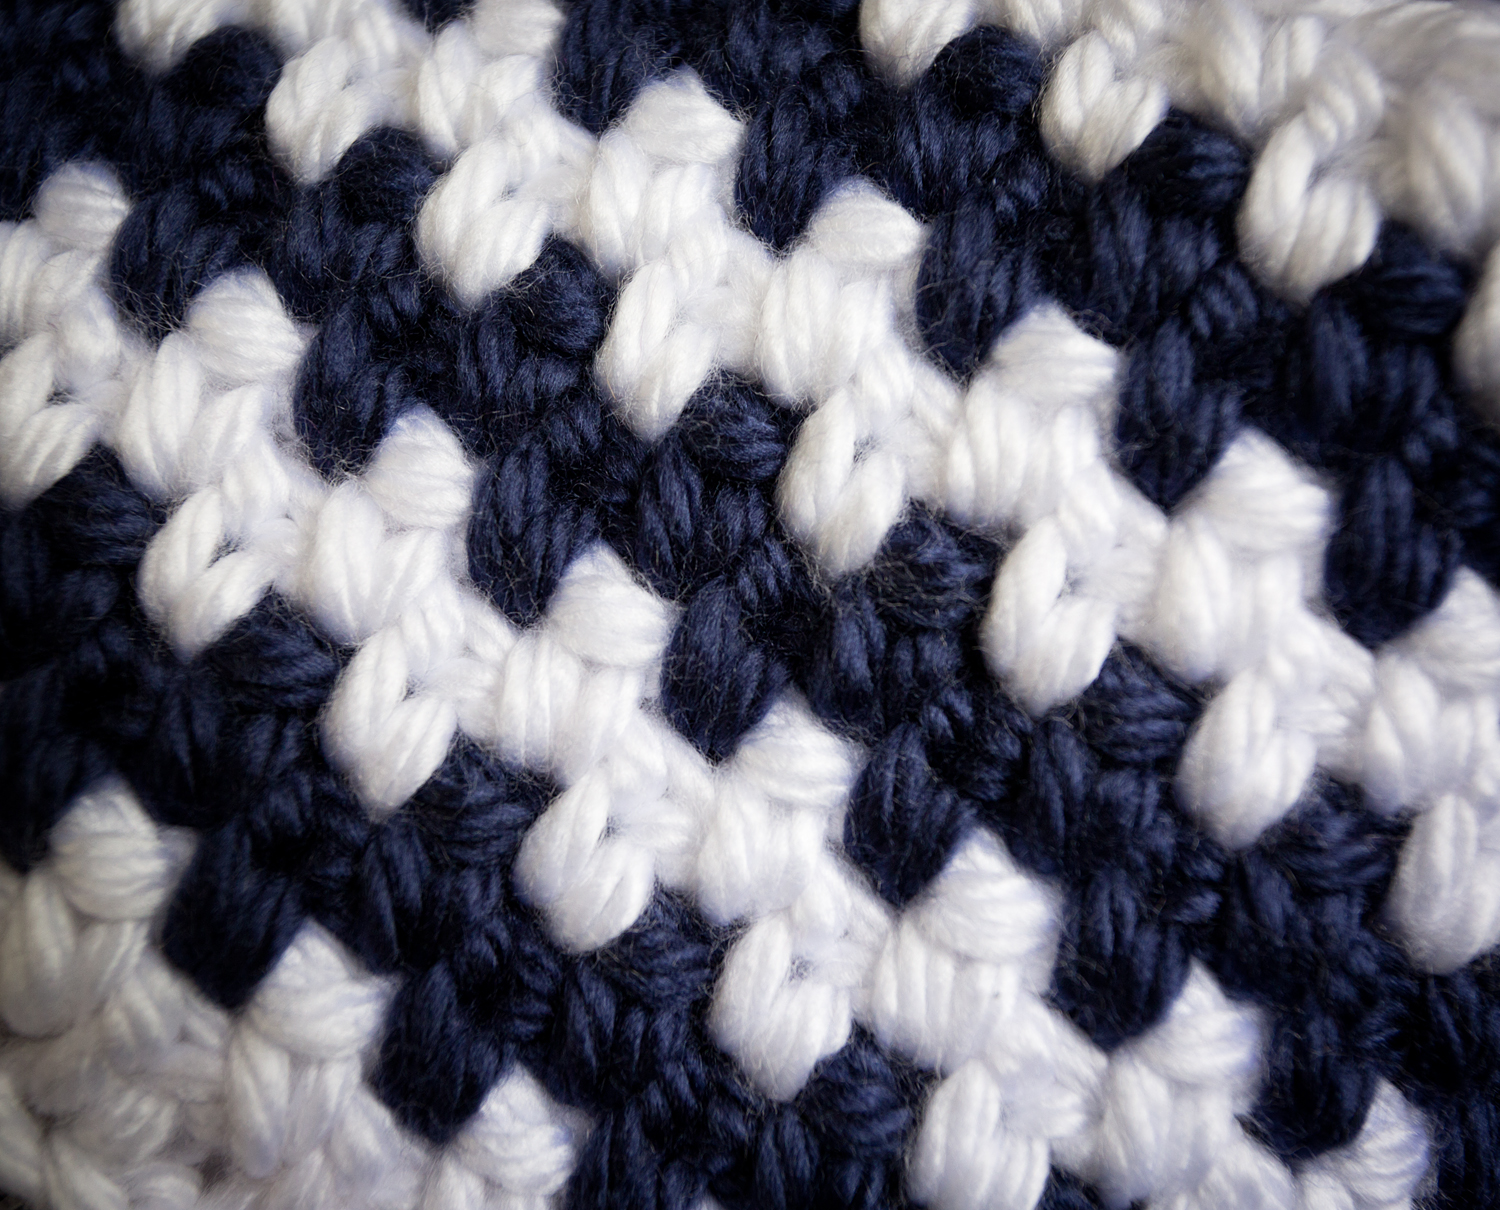
I got the idea for this placemat from two swatches I had created trying to come up with ideas for a blanket for my bed. (My comforter is this giant, fake fur, "chinchilla" that is quite a lot too warm for summer.) I bought some Hometown USA yarn to play around with, and I also tried some ideas with some leftover Hygge yarn (by Red Heart). I have seen the granite stitch mentioned quite a lot recently, and I have been kind of obsessed with making it really look good. The few times I've tried it just looked like single crochet.
So I crocheted up a little Hygge in granite stitch, including a couple color changes. It was gorgeous, but a little thinner than what I was thinking for my bed. I am sure there will be something to come from that experiment. Then I tried a sample with my Hometown USA. I had a skein of white and a skein of purple. It was gorgeous, but too bright and structured for what I wanted on my bed. After a little more messing around, finding the right size hook, I discovered this nice, dense fabric and realized what a great placemat it would make. My kitchen is white and navy, so I got myself a ball of navy and began! I'm not a big placemat person, but I am sure I will be using these.
Free version is below, but if you want to purchase a downloadable/printable PDF, here is a link to my Etsy listing.
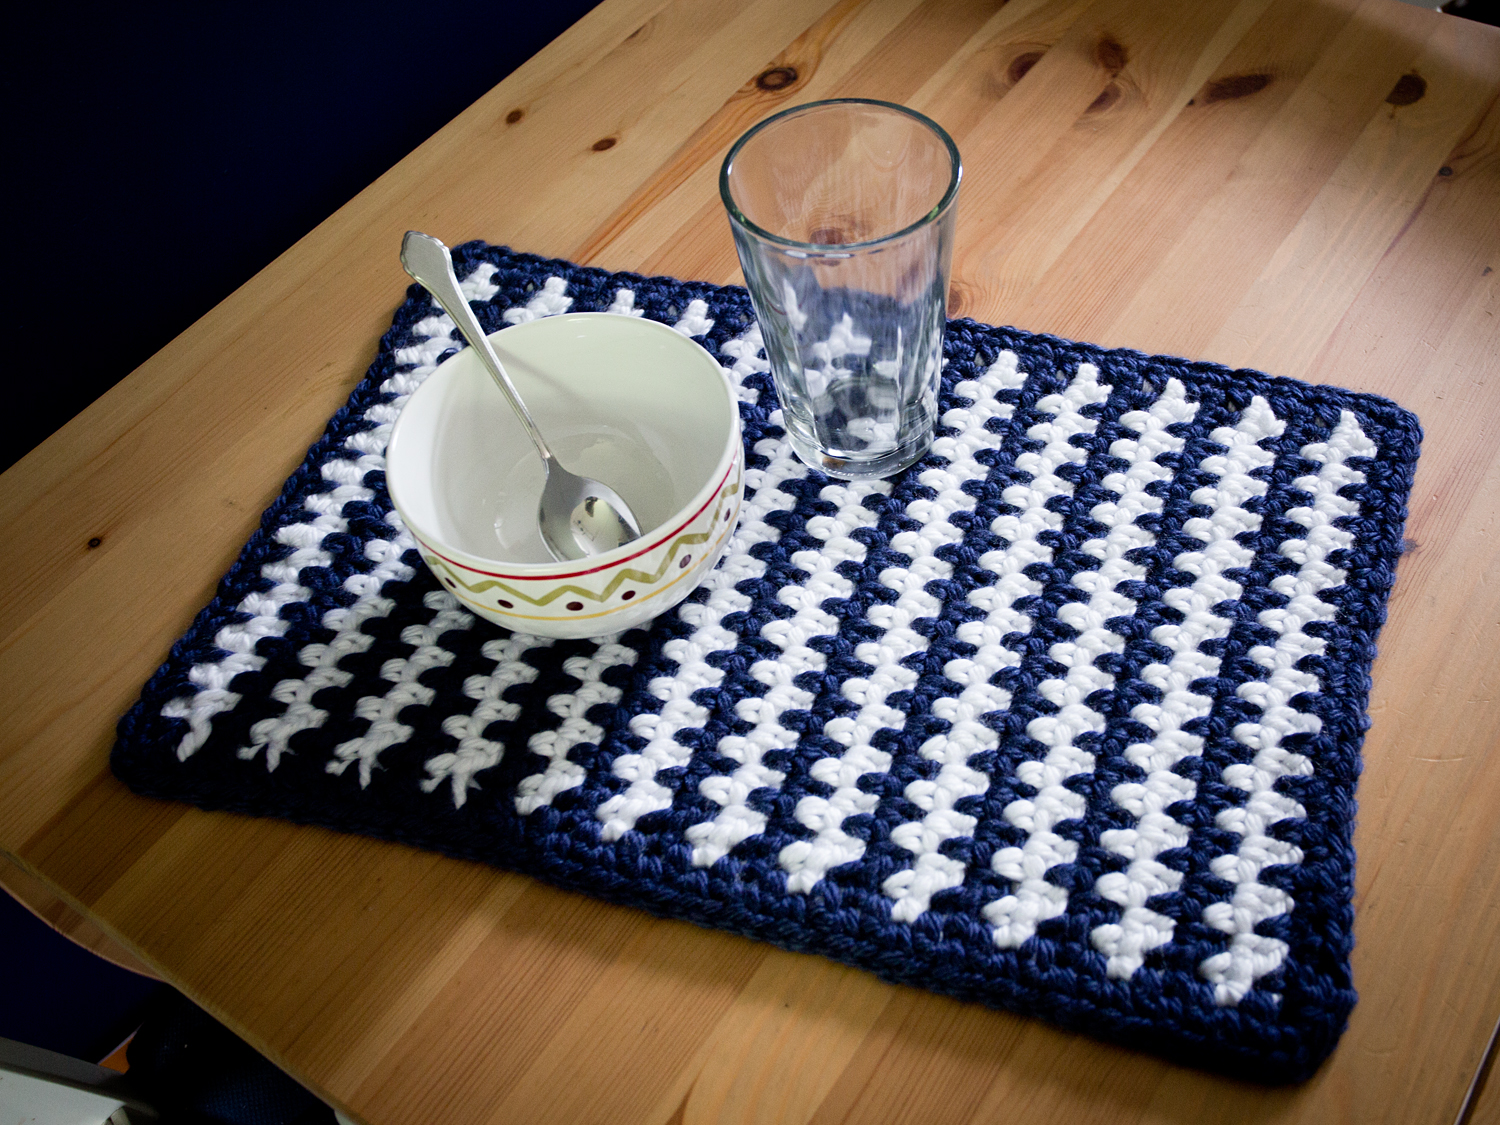
Granite Stitch Placemat
Crochet Pattern/Set of 4 Placemats
Stitches
Chain, single crochet
Measurements
Finished placemat measures approximately 12” x 18.5” (30.5 cm x 47 cm)
Materials
Each set of 4 placemats requires:
Lion Brand Hometown USA (5 oz/142 g; 81 yds/74 m)
Color A: 4 skeins of San Diego Navy (#111)
Color B: 4 skeins of New York White (#100)
Crochet hook size N (9 mm) or size needed to obtain gauge
Gauge
6 sc and 5 ch 1 sp = 4 inches in pattern stitch

Instructions
With Color B (white) Ch 30.
Row 1: sc in 2nd ch from hook; *ch 1, sk 1 ch, sc in next ch. Repeat from * to end of row; ch 1 turn. (15 sc, 14 ch 1 sp)
Row 2: sc in 1st st; sc in ch 1 sp. *ch 1, sk next sc, sc in next ch 1 sp. Rep from * to last st. Sc in last st. Change to Color A in last sc (see notes). Ch 1, turn. (16 sc, 13 ch 1 sp)
Row 3: (with Color A) sc in 1st st. *ch 1, sc in next ch 1 sp. Rep from * to end of row. Ch 1, turn.
Rows 4 - 46: Repeat Rows 2 - 3, changing color every two rows (between rows 2 and 3). Last row will be a repeat of Row 2. Change color at the end of last row.
Row 47/Border: With Color A (navy), repeat row 3. Do not turn at end of row; continue down left side (as held while working) of placemat. Ch 2, sc in same stitch (last sc of row below). *Ch 1, sc in end of every other row. See notes/tutorial on edging for proper placement of stitches. Repeat from * to end of side. Sc, ch 2, sc in corner stitch. Continue pattern across last two sides, always sc, ch 2, sc in each corner stitch. Notes/tutorial has directions for bottom row to maintain a consistent pattern and avoid holes. After last corner, ch 1, sl st to first sc.
Border Row 2: [*Ch 1, sc in first ch 1 space. Repeat from * across. Sc, ch 1, sc in corner ch 2 space.] Repeat for all 4 sides. Ch 1 sl st in first sc. Fasten off. Weave in ends.
Notes/Tutorial
Changing color
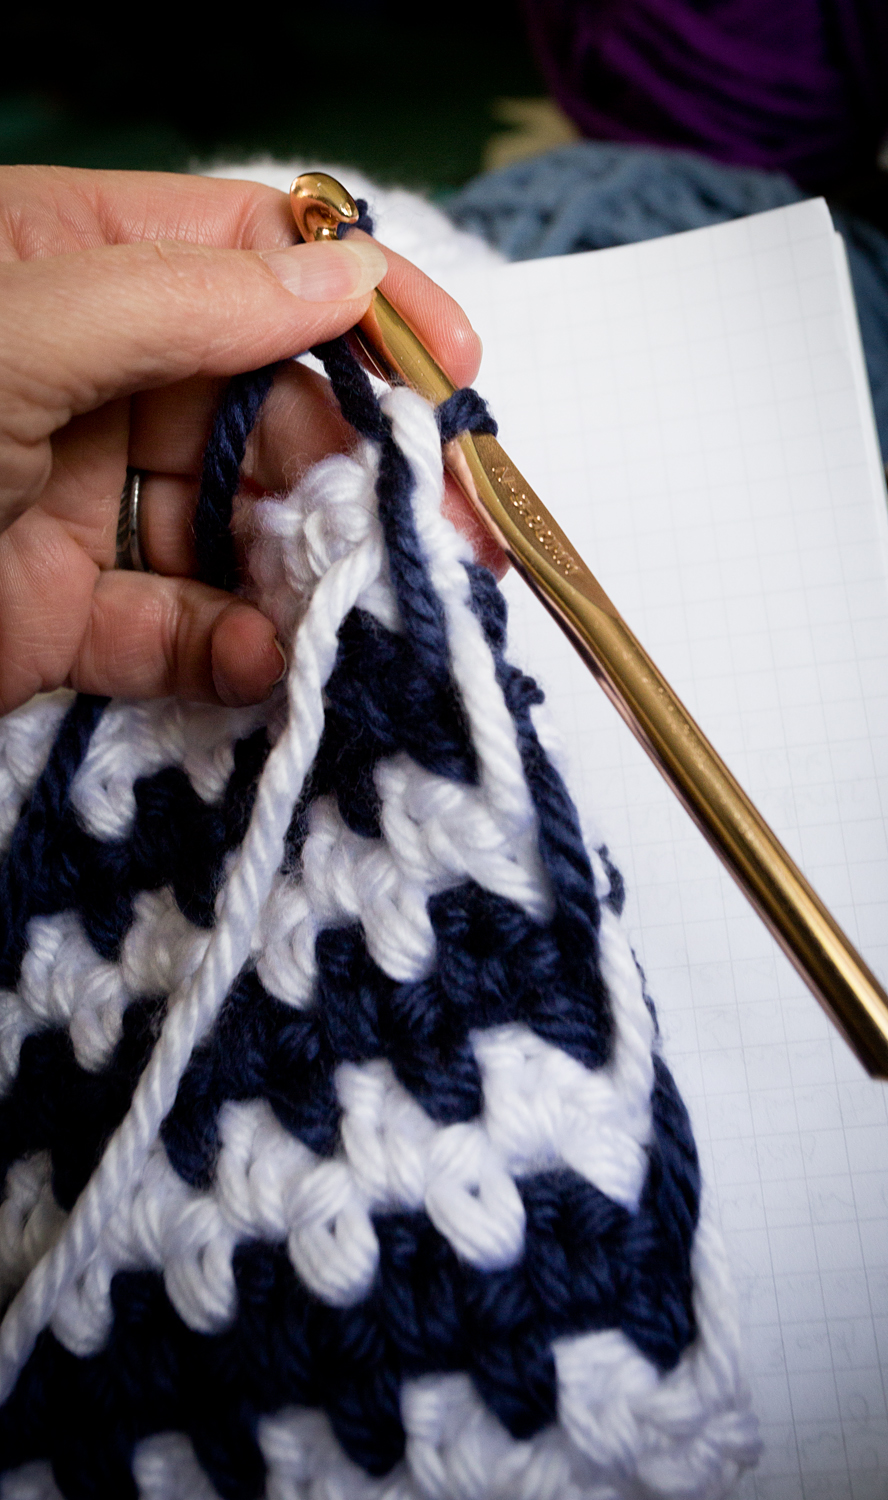
To change color, work the last sc in the row until the final yo. Hold new color as your working yarn, yo, pull through both loops on hook. The stitch should be the previous color, with a working loop of the new color.
To weave in the tails while you work, hold the tail of the old color along the top of the row you are working into. (Pictured to right, old color is white. Notice the hook is inserted under the white tail and through the stitch.)
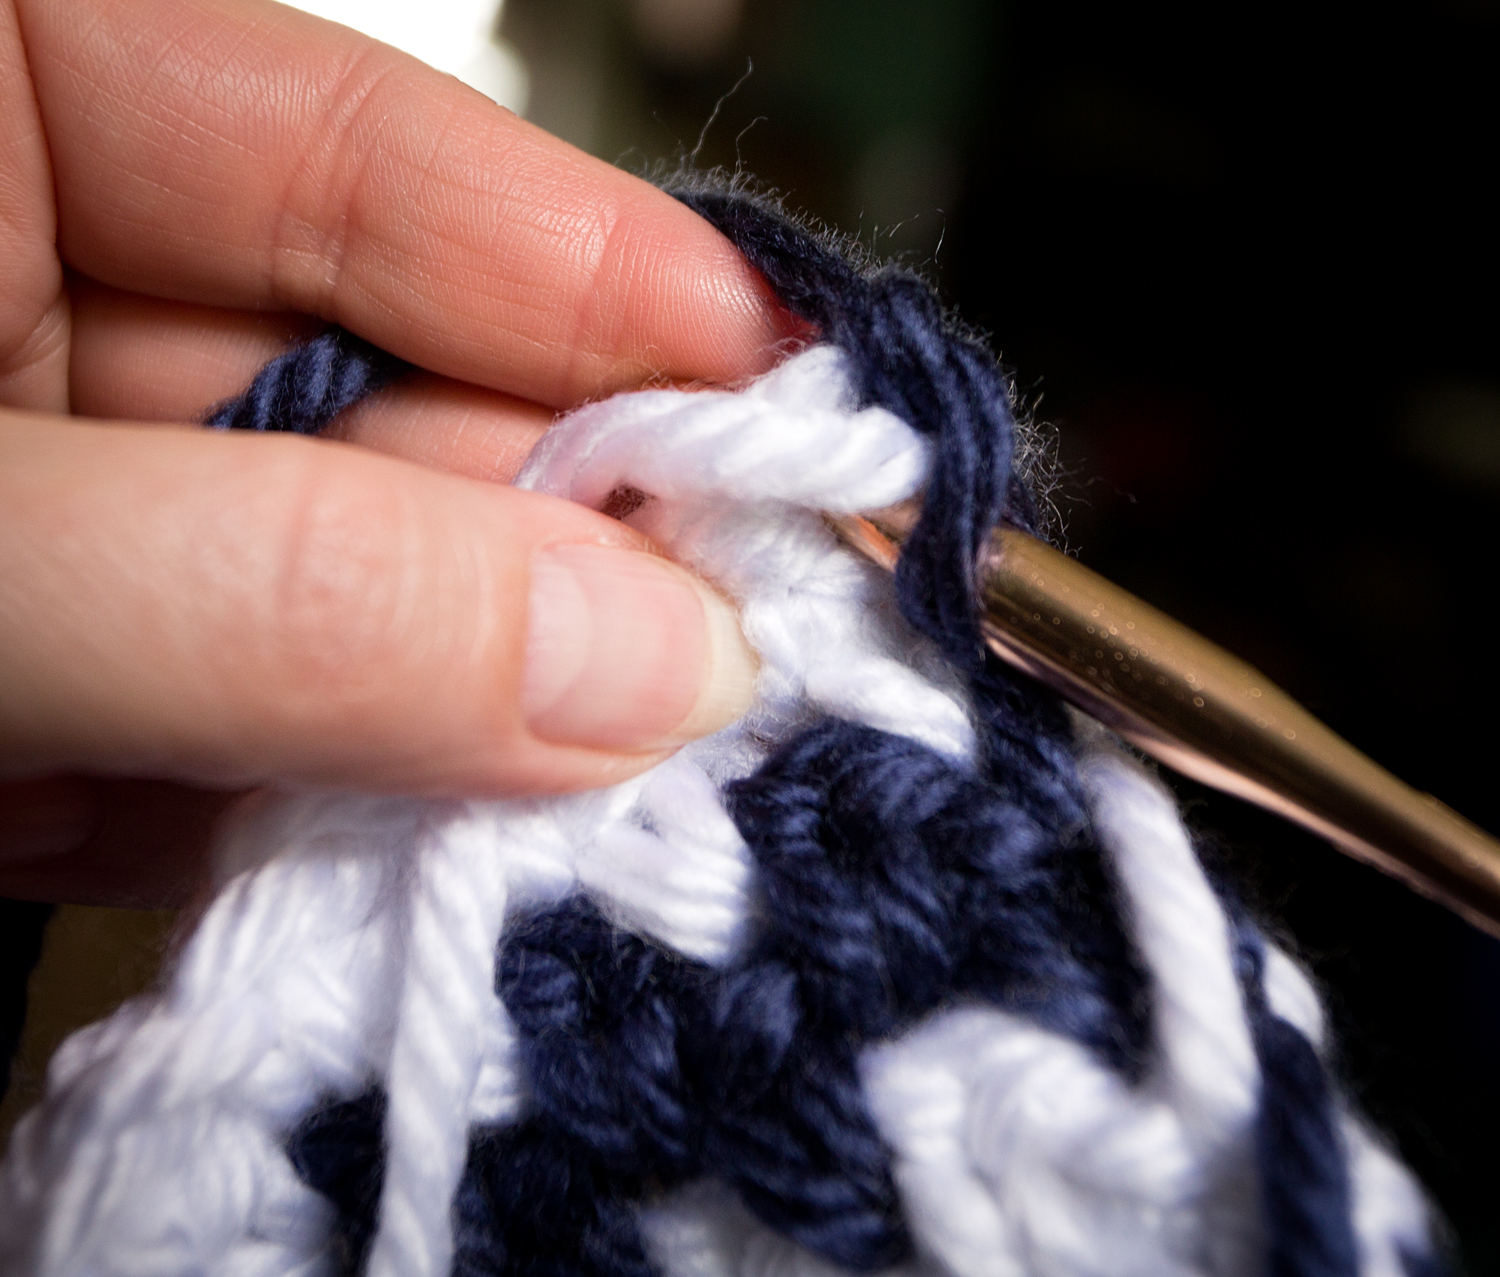
Continue work across row, holding yarn tail so that each sc is worked around the tail. (Left)
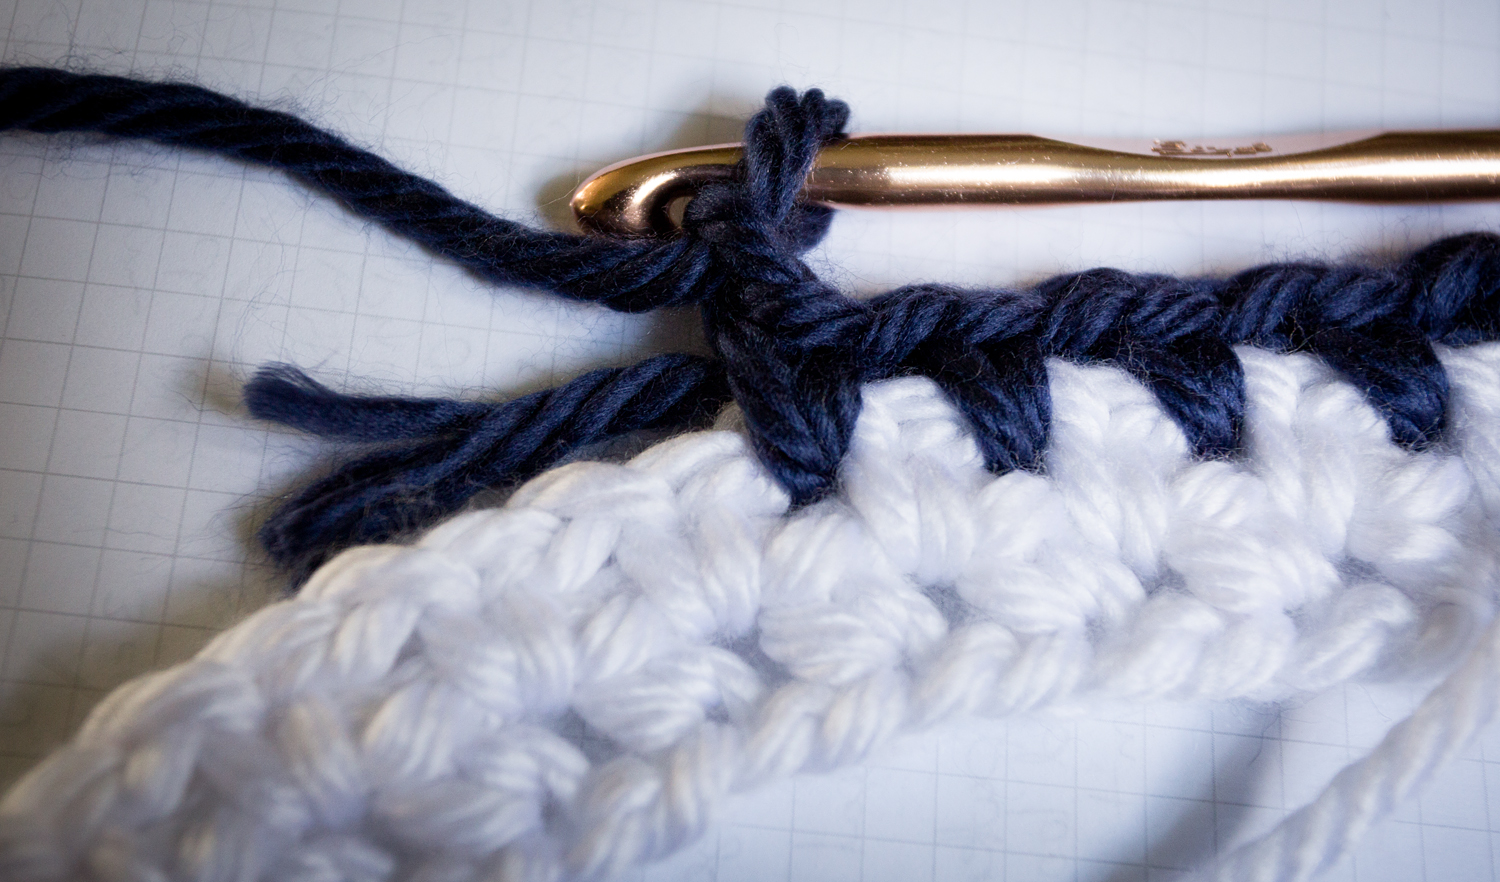
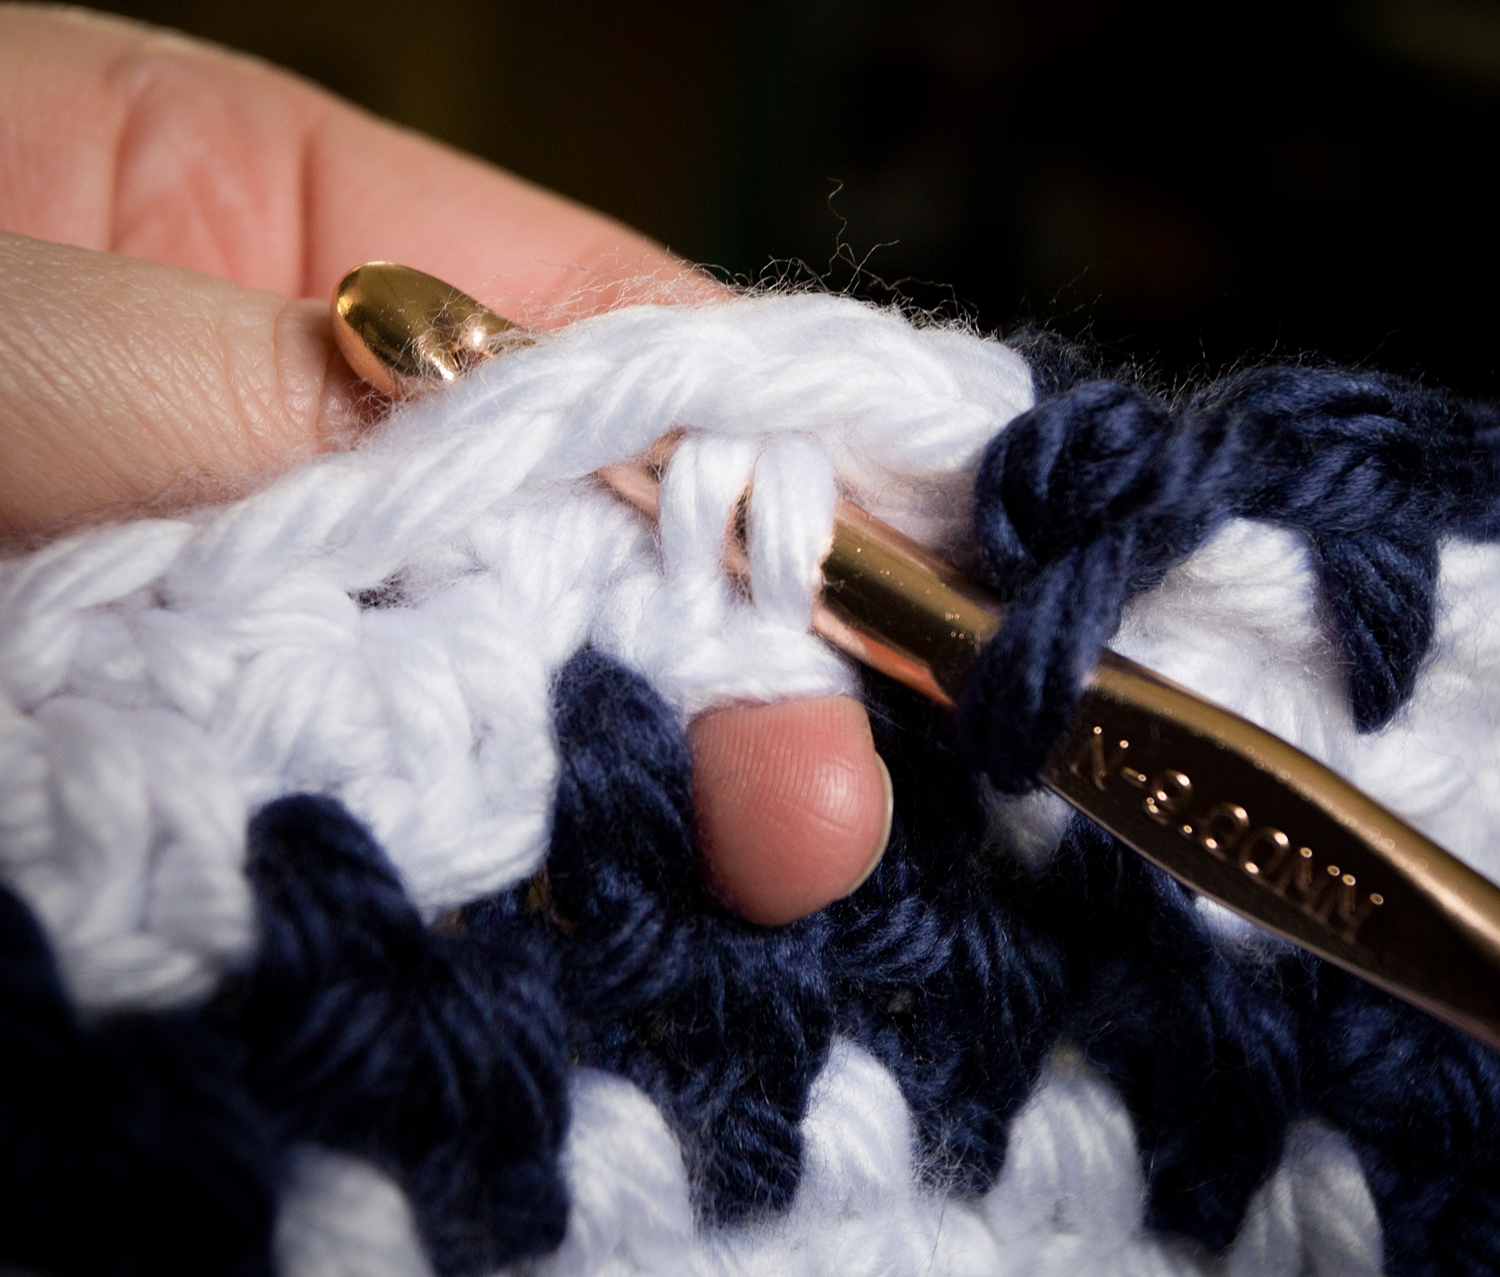
To keep the tail extra secure, because we are skipping stitches, on the return row, insert hook below tail that will be running through each ch 1 space. This way the tail is encased in every stitch for that row.
Below you can see the extra line of navy yarn just above the white in the last ch 1 space in the row.

Edging


To evenly space the border along the first long side (left as working last row/first side of border), insert your hook under the stitch nearest to the edge. This will be the left-most (bottom) row of each color. In the picture above, you can see the distinct stitch directly below my thumb in white. In the second picture, I am inserting the hook around that stitch.
Along the bottom edge, you can use the chain 1 spaces for your border, but it will leave a row of holes. I did it a little differently. I inserted my hook sideways through the sc above (or below, depending on your perspective), shown in left picture below, then through the ch 1 space to complete my stitch. This kept the look consistent for the entire border by providing a blue “spike” between the ones from the first blue row.


I know this placemat looks all thick and cozy, but do NOT use it to place hot pans. The yarn used is 80% acrylic, and is not designed to handle high heat, so it may melt or worse.
Copyright © 2019 Sharon Hansen/Yarnmare
www.yarnmare.blogspot.com | facebook.com/yarnmare | Instagram @yarnmare
The pattern and photographs of this design are the property of Sharon Hansen/Yarnmare. This pattern and design are subject to copyright, and are for personal, non-commercial use only. You may not distribute or sell this pattern or any items created using the directions in this pattern without consent. Please email yarnmare@gmail.com with any questions.


Comments
Post a Comment